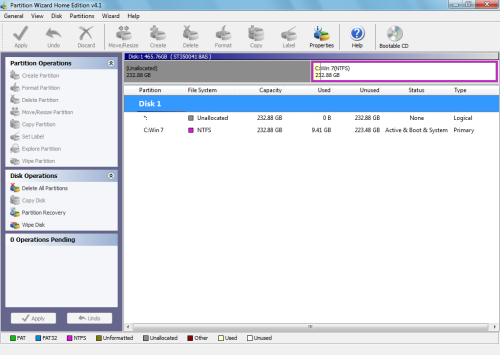
How to Capture Unallocated Partition Space in Windows 7
- To begin, right-click on the Windows 7 partition and select the Move/Resize command, as shown in the following picture.
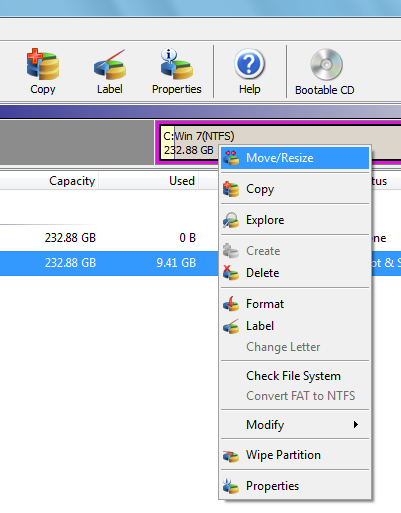
- Select the Move/Resize command on the Windows 7 partition.
As soon as you do, you’ll see the Move/Resize Partition dialog box, where you can resize the partition either by typing the appropriate numbers in the text boxes or by simply selecting the marker at the beginning of the partition and dragging it all the way to the left.
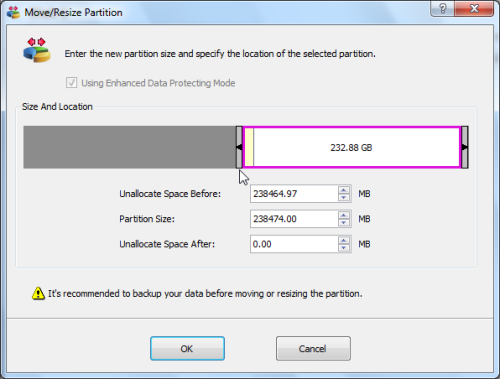
- You can resize the partition by dragging the marker all the way to the left.
- Once you drag the marker all the way to the left, you’ll see that the partition now occupies the full hard disk, as shown in Figure D. To continue, click OK, and you’ll return to the main Partition Wizard window.
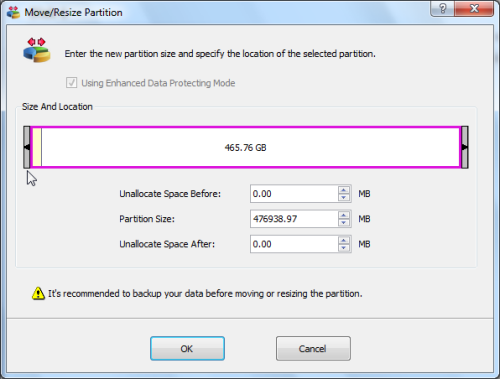
- The partition is now staged to occupy the full hard disk.
- To initiate the Move/Resize Partition, you can click the Apply button below the Operations Pending panel, as shown in Figure E.
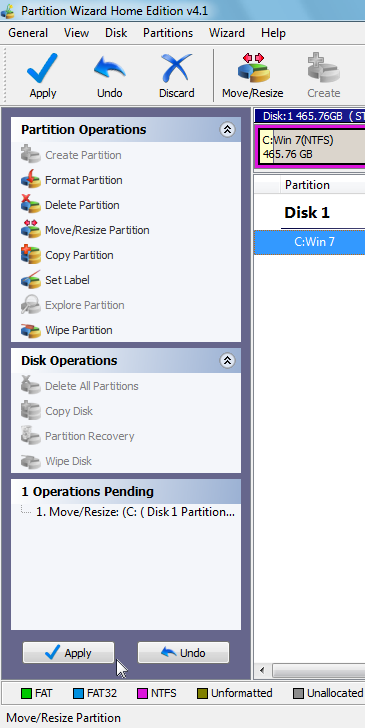
- Click the Apply button below the Operations Pending panel to initiate the Move/Resize Partition operation.
- When you do, Partition Wizard will recognize that the partition that you are resizing is the current partition and will display an error message that will also prompt you to restart the system, as shown in Figure F.
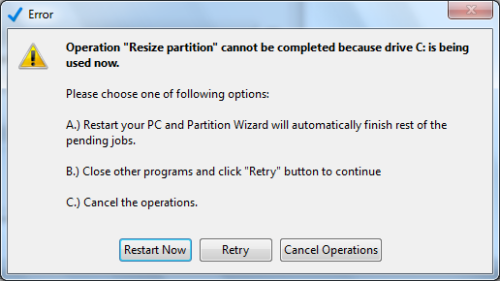
Partition Wizard will prompt you to restart the system so that it can perform the Move/Resize Partition operation.
No comments:
Post a Comment